Setting Up My Domain
Posted On: November 20 2023
Written by Julian Lopez
Table of Contents
Why did I buy a domain?
Recently I decided to purchase a domain through AWS Route 53 for the purpose of making connecting to my server at home easier. Before I bought this domain whenever I had to connect to the stuff I have hosted on there (RSS feeds/media server/torrenting/etc) I had to type out my entire IP address. This is obviously a pain to do multiple times per day, and there are certain services/apps that don’t work well with just IP addresses. Thus, I decided to pay $11 per year for this domain (julianlopez.net).
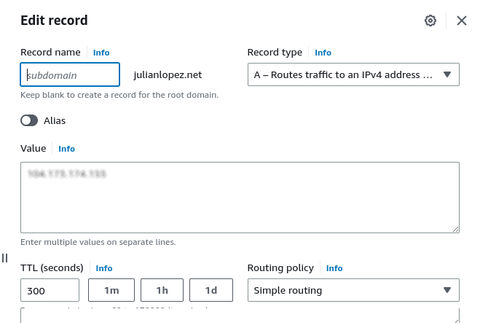
Having it point towards my home server was super easy, all I had to do was create an A record in my DNS records with no subdomain and the value being my server IP address. After I did that, it worked perfectly! All I had to do in order to connect to my server via SSH was just type in the domain and login info and it worked!

Subdomains are awesome!
However, I got inspired by a post by Chris Coyier to try using subdomains to better organize and keep track of all the stuff I have running on ports off my server. Plus, there was one time that I tried showing said stuff to a friend while at their place, but I completely blanked out on most of my port numbers! I wasn’t able to show them much… Never again!
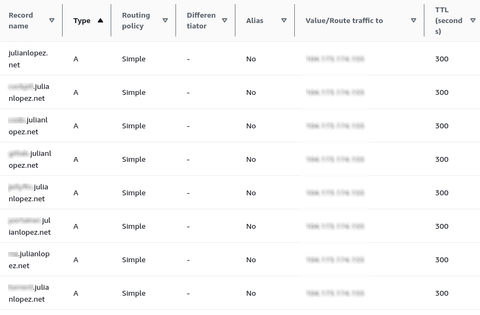
Af first, I was at a complete loss at how to do this. I was able to create subdomains within the AWS console, but I couldn’t route them to my server. Eventually I figured out that within DNS records you can only have an IP address, you can’t have an IP address and port number there. Instead what you have to do is create A records for your desired subdomain and have them point to the exact same IP address as the initial A record.

Now all these subdomains were being routed properly to my server, but once at the server they were not being routed to the port they needed to use. For that I had to set up Nginx to properly forward my requests to my port of choice.
Within the http section of my Nginx config (on my Ubuntu server its filepath is /etc/nginx/nginx.conf) I added code similar to what I have below to redirect requests from port 80 (the default port web browsers try to connect to) to the appropriate port. server_name is just the subdomain plus domain.
http{
    ...
    server {
        listen 80;
        server_name subdomain_one.julianlopez.net;

        location / {
            proxy_pass http://localhost:69;
            }
    }
    server {
        listen 80;
        server_name subdomain_two.julianlopez.net;
        location / {
            proxy_pass http://localhost:420;
        }
    }
}
After restarting Nginx (I ran /etc/init.d/nginx restart as root), I no longer had to type in port numbers when accessing my stuff! I was initially concerned that switching to subdomains might break some functionality, but everything worked perfectly.
Making my blog cooler
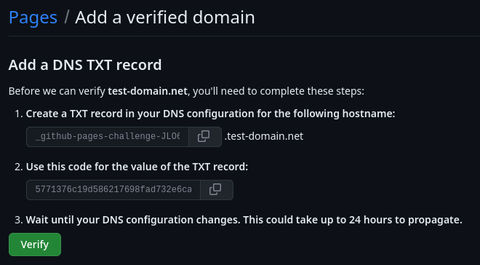
I could have my blog accessible through my domain through Nginx served off my server since it’s a static Jekyll site. However, I like using GitHub Pages for for my site hosting since it provides SSL certificates without having to do anything extra. Additionally, I like the idea of showing off my site assets (HTML/CSS/JS) if anyone wants to copy something I made. Thankfully, GitHub Pages allows you to use your domain along with a subdomain to host your website. All you have to do is verify your domian via DNS records, then add a filenamed CNAME containing your subdomain and domain (in my case: https://www.julianlopez.net/)

If you want to host more than one website on your same GitHub account you just need to repeat all these steps, but also change the url in your Jekyll _config.yml file to your subdomain and domain.
What about the root domain?
At this point, when I put julianlopez.net into my web browser I just got a page from Nginx. This seemed like a waste of this URL, plus people trying to access my blog probably wouldn’t type in the www. part. To fix both of these problems I decided to have my server route all requests for my root domain ot my
server {
    listen 80;
    server_name julianlopez.net;
    return 301 https://www.julianlopez.net;
}
I was worried that this might reroute ALL requests to my server (including SSH) but this is not the case. It only reroutes web traffic (port 80 stuff) so I have nothing to be worried about.
Conclusion
At first, this was all beyond daunting to even attempt but this all now feels super easy to set up! I believe the lack of proper documentation and explainers for some of these topics (especially setting up multiple sites on GitHub Pages) contributes towards making this all look hard.
In the future I might look into having Nginx run via docker so that I can manage it in Portainer alongside all the other containers I have running, but I’m concerned about how that might work with SSL encryption via Let’s Encrypt.
-
512KB Club
Green Team
darktheme.club
Member
-
Site Last Updated:
January 18, 2026